If you’re a customizer, you’ve probably ended up with a custom with a wobbly or loose head. Maybe the existing socket on the head you’ve swapped in is too big, or you drilled out a hole in a resin head cast that’s wide enough to fit over the peg only to find it flops around like it’s on a bobble head. Because I’m a lazy customizer, I had around half a dozen “finished” customs that were like this. For some, the heads would flop around mercilessly. For others, if you knocked the shelf the heads would just fall off. Pretty bad – I know.
Faced with this situation, a pro customizer would use a two part compound like Apoxie Sculpt or Kneadatite, fill the socket part ways and attach the head – and before it was completely cured, would twist the head so it wouldn’t be stuck in one spot. (Or, as some of you will no doubt be thinking, a pro customizer would have drilled the right size socket to begin with…) But I’ve found a much easier way – with silicone sealant. This is the stuff people use for things like aquarium repairs (I think) and… ok, I’m not a hardware guy, so I have no idea what else it’s used for. All I know is that I use it to attach heads to action figures. It takes five minutes and is super easy.

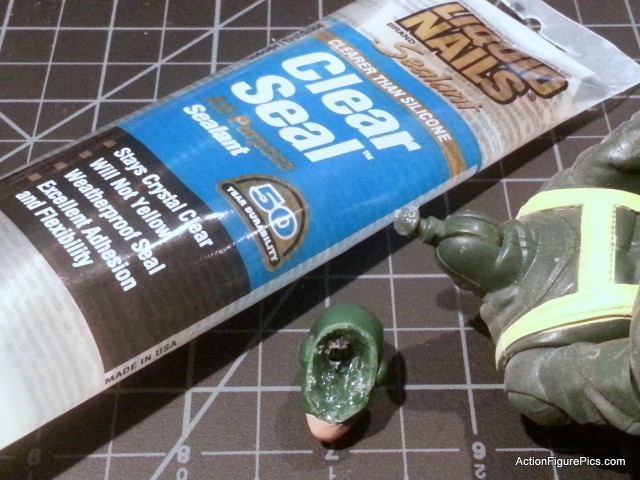
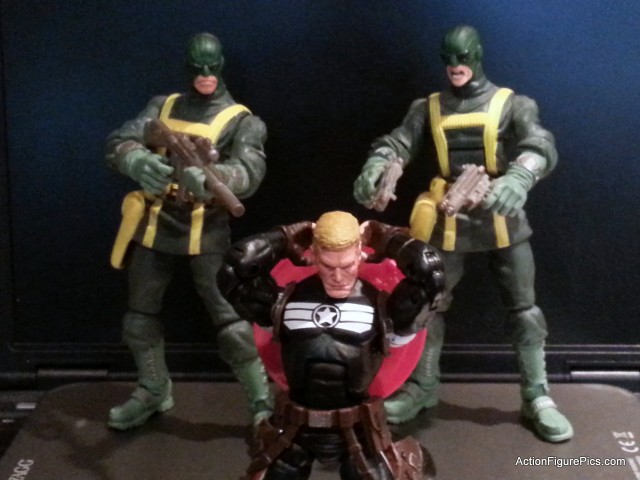
To give you an idea how lazy a customizer I am, these simple HYDRA goon headswaps from the Marvel Select Spider-Woman base to the Hasbro Marvel Legends figures have been “finished” for years. But if you touched them or just accidentally bumped the shelf, their heads would fall right off. With the guy pictured above, the socket I drilled into the head was so big I could have forced the head onto one of the new Marvel Legends female figure bodies with those huge pegs.
The fix is very simple. Squeeze some sealant into a ring at the lip of the socket. As you can see here, you don’t even have to be very neat. This was about the fifth or sixth figure I was finally fixing, so the tip of my sealant was getting gunked up pretty good (too lazy to wipe the nozzle off). So I just used the end of a wooden skewer that I keep around to stir paint to push the silicone into place. For good measure I also put a small dollop of silicone onto the peg, which was pretty narrow to begin with. Waited five minutes for the silicone to form a skin (you can wait 24 hours if you think you might mess it up) and then I attached the head. Done.

The very nice thing about using silicone is that it’s flexible – you don’t really have to worry about using too much. All the heads I’ve attached using this method are very securely attached now, and when I move them around, there’s a very odd feeling of the peg moving against the silicone-coated socket. It doesn’t inhibit movement at all – it just feels different from a plastic peg moving against a plastic socket.
I also used it to fix a DC Universe Classics Batman that had a loose barbell joint in the neck socket – you know, before Mattel removed that point of articulation so their DC action figures would have the same head movement as the Michael Keaton Batman. So even though the head was secure, it would still flop around. A fair amount of silicone in there (moving the peg around so it would only adhere to the socket and not the peg) and that neck is no longer floppy. This approach will probably work for tightening any peg and socket joint. Give it a try!
Any other tips for lazy customizers? Send them my way!

if you have enough of it you can actually use it to make cheap silicon moulds too. It stinks, and takes an age to cure(building up thin layers helps) but it does work. We used to do that at University to save money
@Caitlin – cool tip – thanks! the stuff I have is pretty thick, so I think it’d be pretty hard to spread it thinly enough to get it to cover something completely and still cure. and then there’s the lazy factor 😉