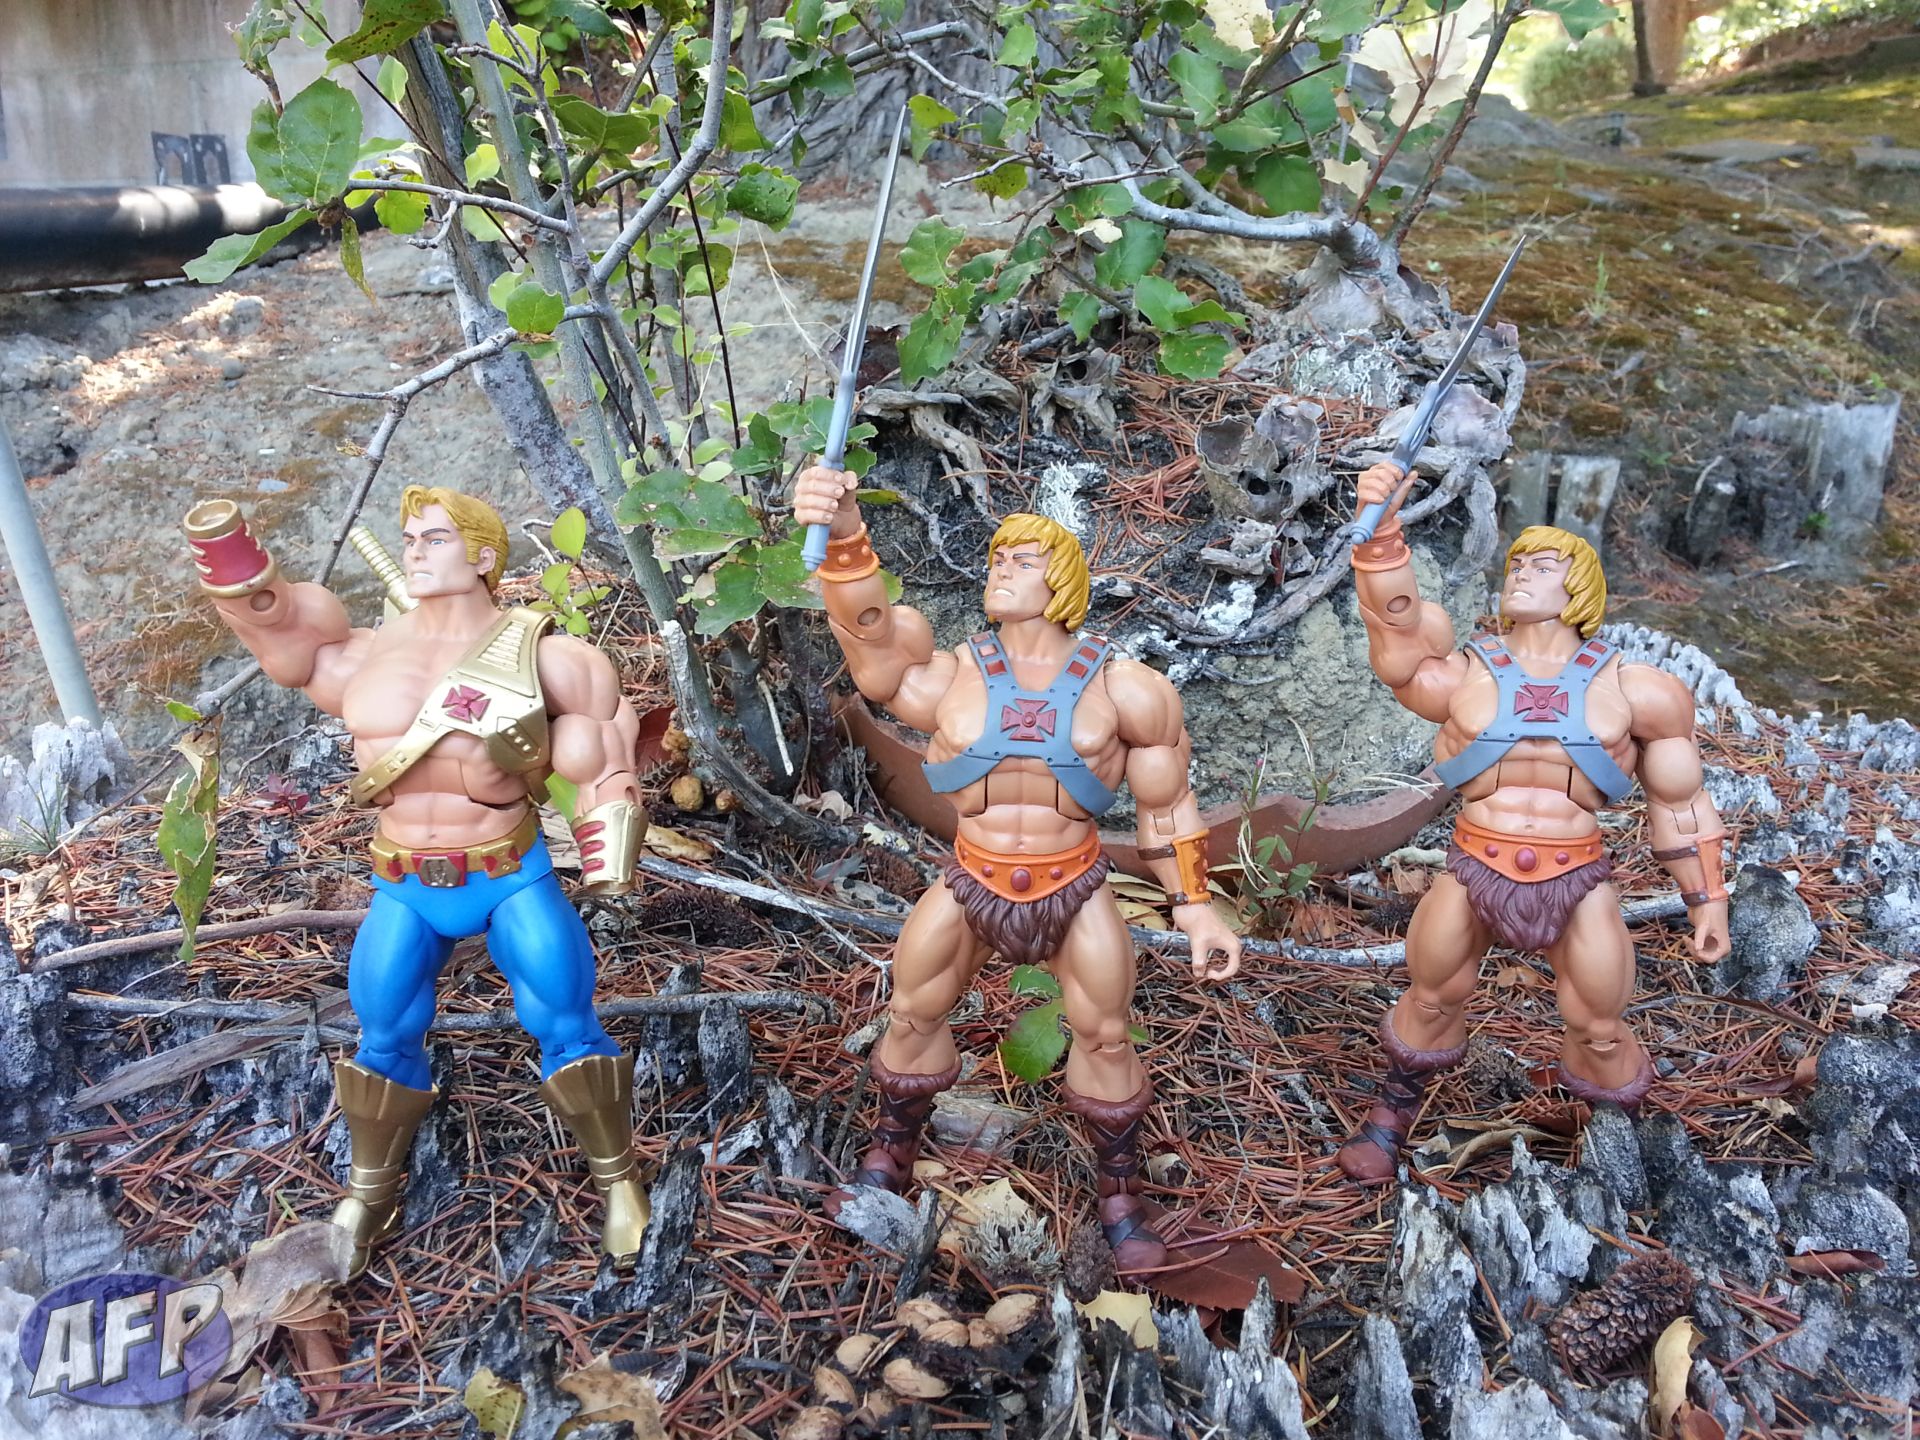
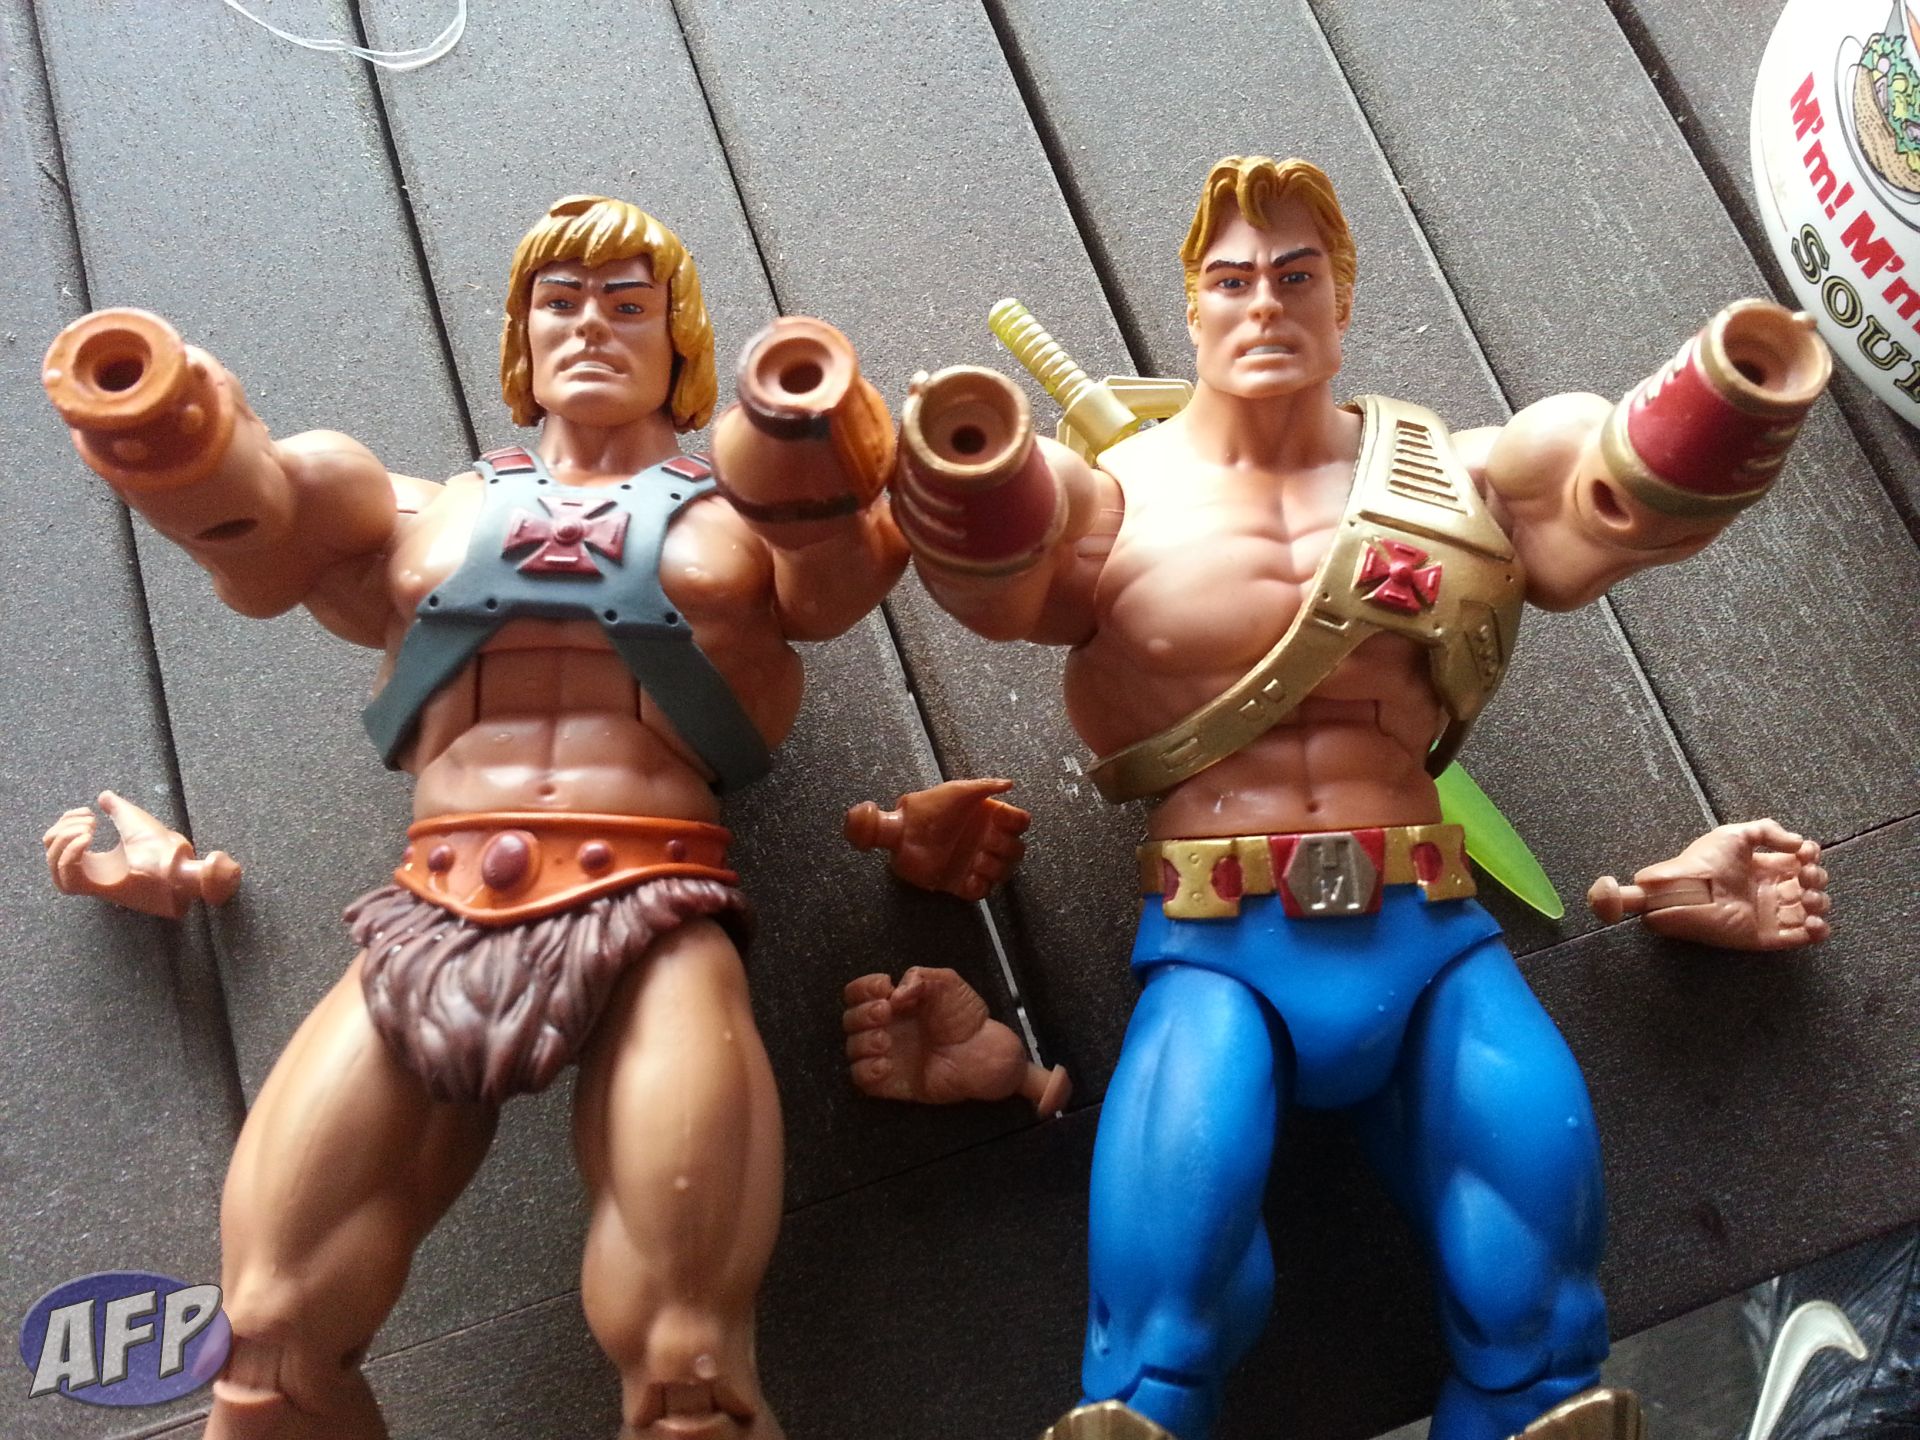
Once this was pointed out to me I just couldn’t unsee it – a regular Masters of the Universe Classics He-Man can’t hold his sword straight up in his iconic pose when HE HAS THE POWER! He can get pretty close, but since he just has an ordinary swivel wrist, he’s perpetually stuck holding the Power Sword nearly perpendicular to his forearm.
The latest He-Man variant, New Adventures He-Man doesn’t have that problem. In addition to the wrist swivel, he also has a hinge in each wrist. On his right wrist, the hinge allows him to move his hand back and forth, like a conductor tapping his baton against his lectern, or a politician gesturing emphatically that he did not have sexual relations with that woman. In other words, that means that NA He-Man can point his sword straight up.
If you’re like me, you’d rather the real regular He-Man be able to do the pose (did Mattel call it Grayskulling?) – in this post, I’ll show you how I gave He-Man the New Adventures He-Man hands. And don’t worry – even if you’ve never customized before, you can do it too – there’s almost no way you can screw it up.
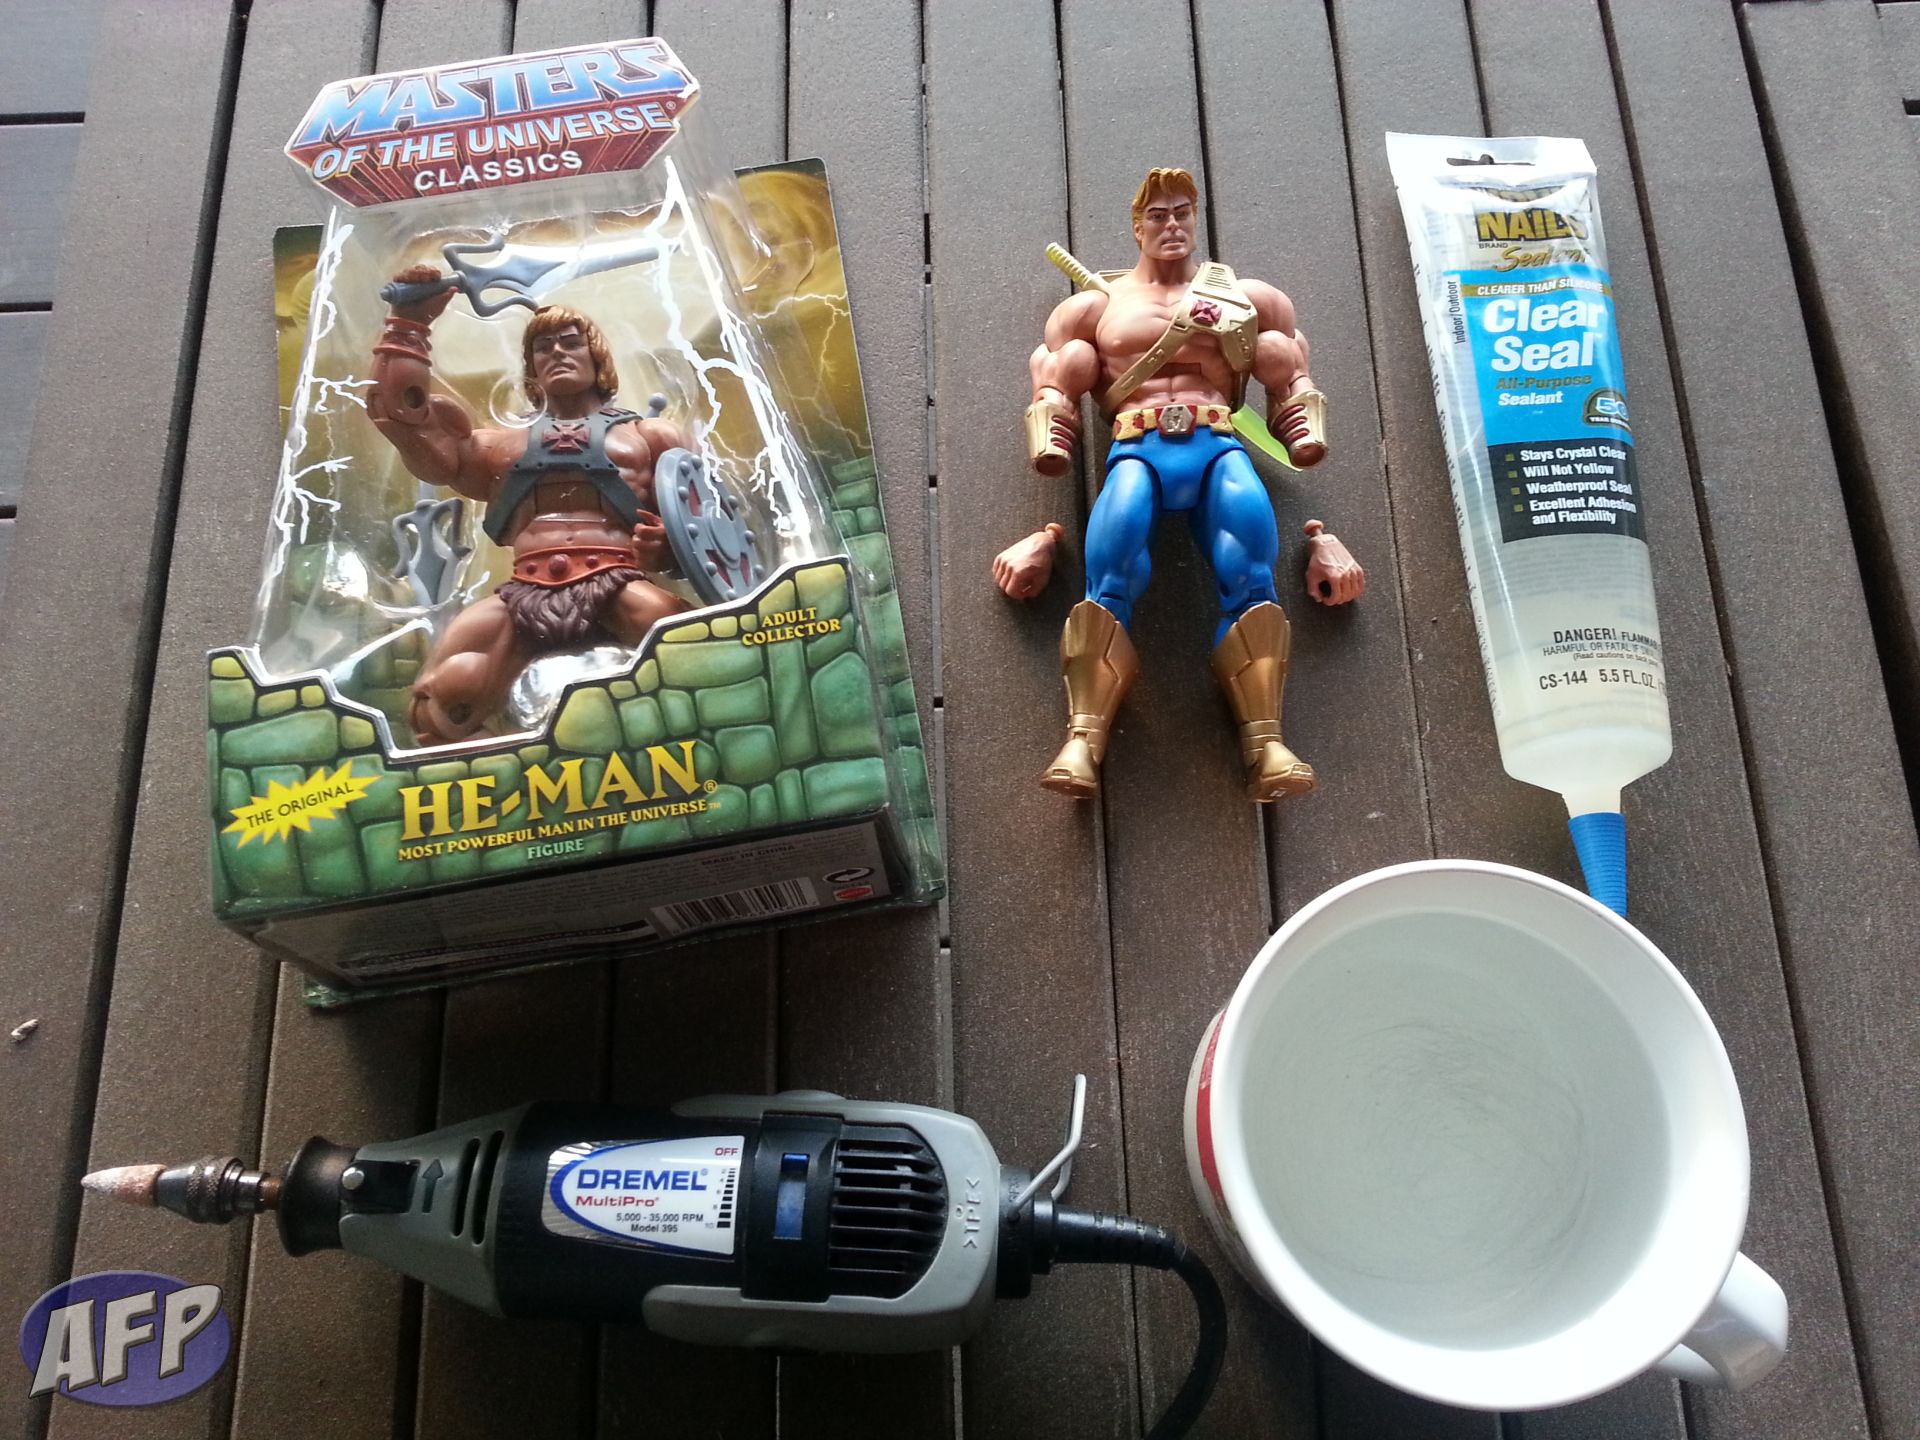
Here’s what you will need:
- He-Man and New Adventures He-Man action figures (naturally)
- A rotary tool (any will do, but I like the Dremel Multipro) with grinding stone and high speed cutter bits
- Some kind of clear silicone sealant
- A cup of really hot water
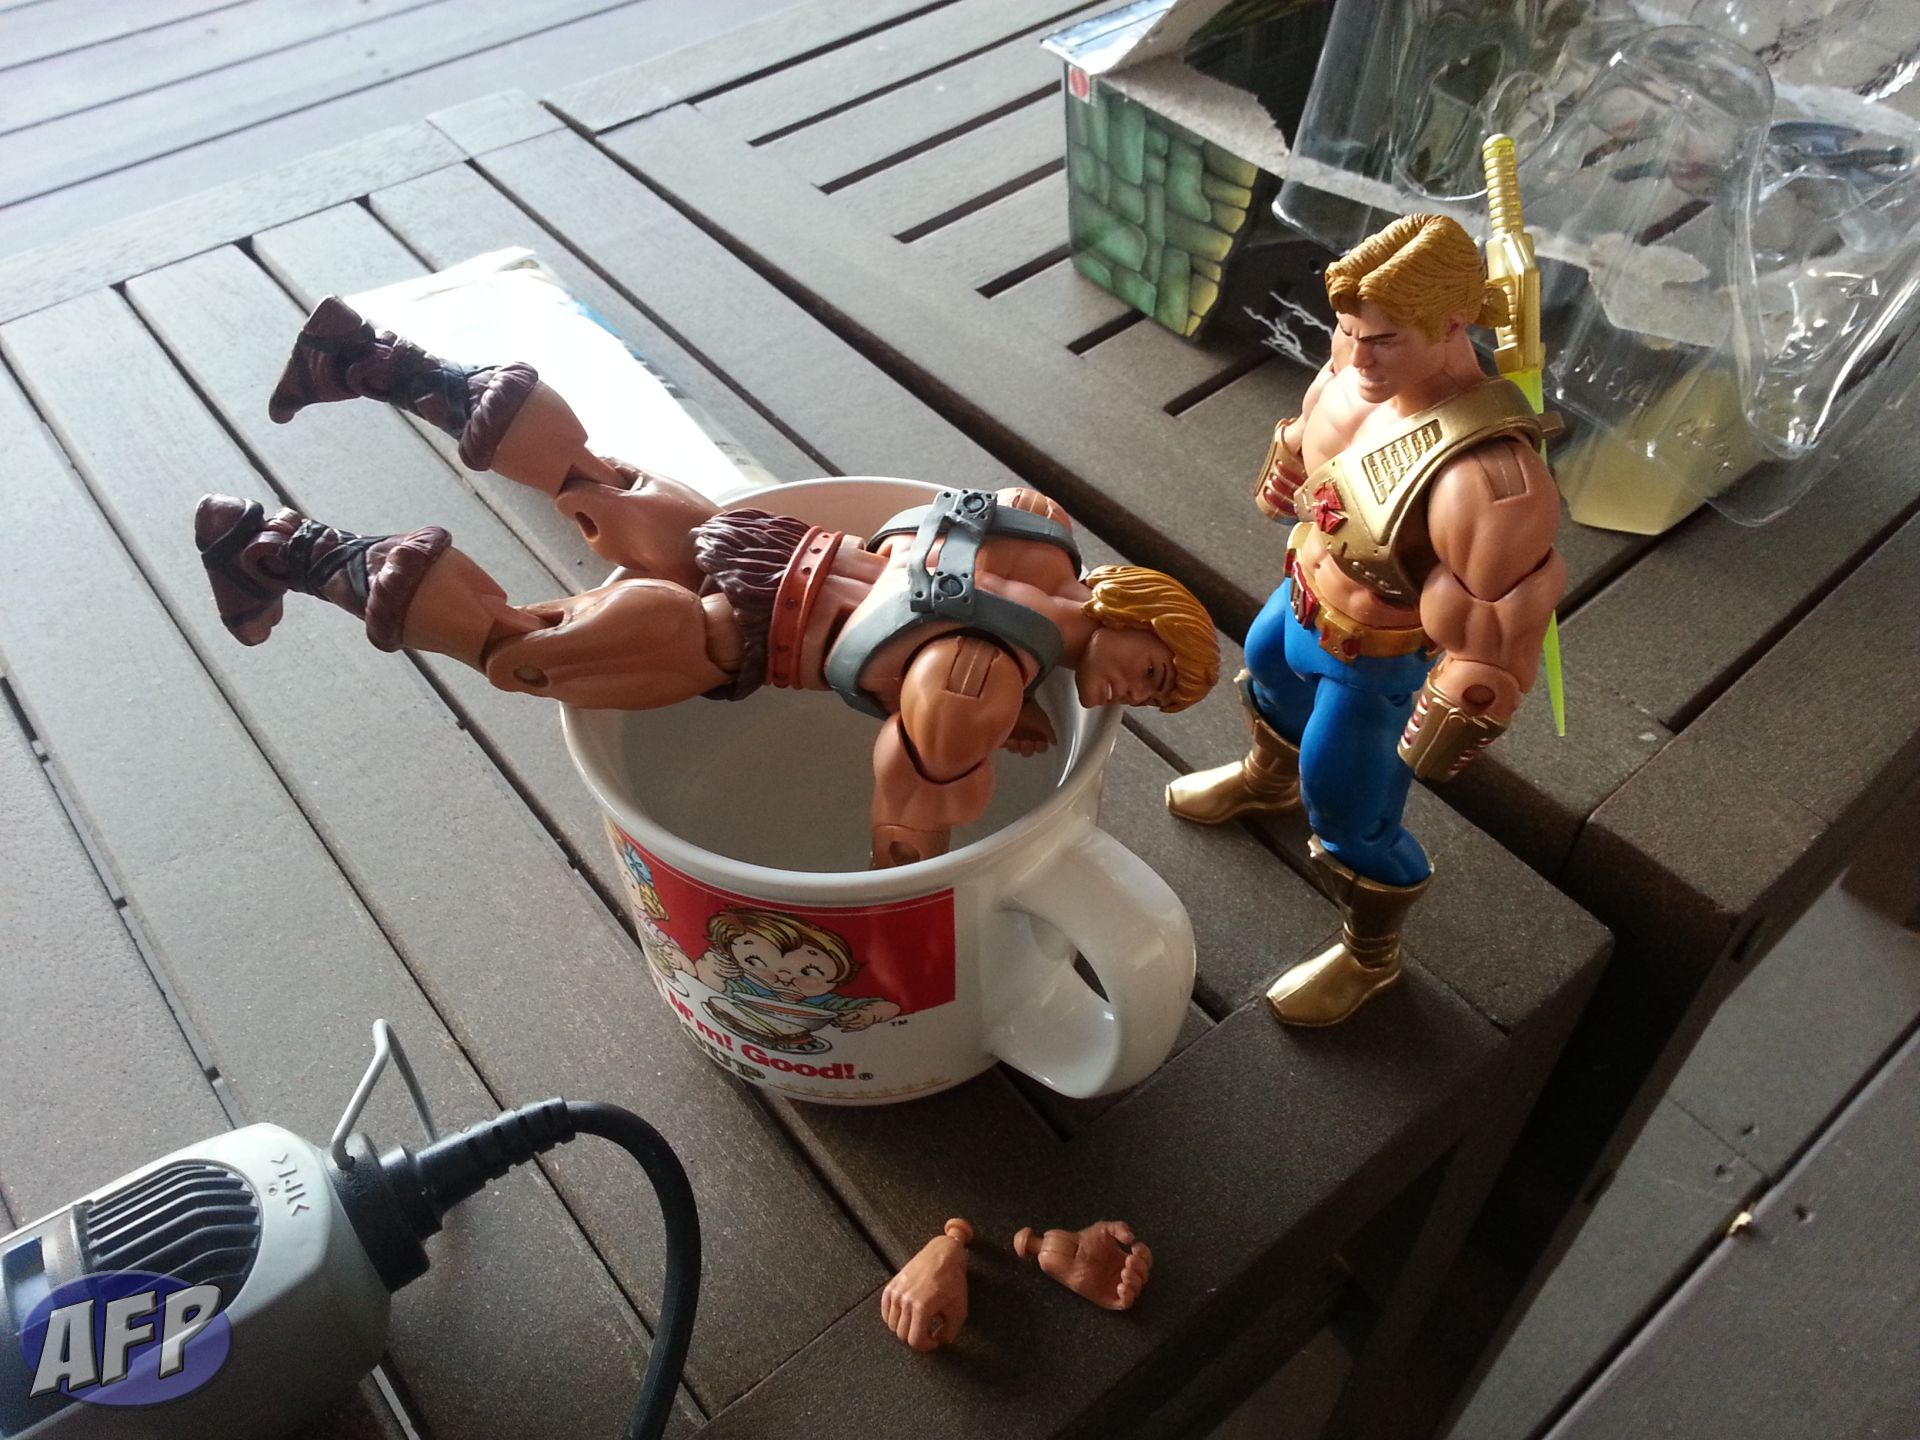
1) Boil and pop the hands off of both He-Man figures.
If you’ve never done this before, it’s simple. You’ve got hot water (either boil it, heat it up in the microwave, or do what I did – use the convenient hot water dispenser by the sink) – stick your figure in it. Since I’m only swapping the hands, I’ve just got He-Man’s arms in there. You can’t really over-do this, so if you’re finding it hard to pop the hands off, stick them back in the hot water to soften up the pegs and the disks that holds the pegs in place. Pop!
At this point you could simply pop in the New Adventures hands and be done – but you should brave the next steps.
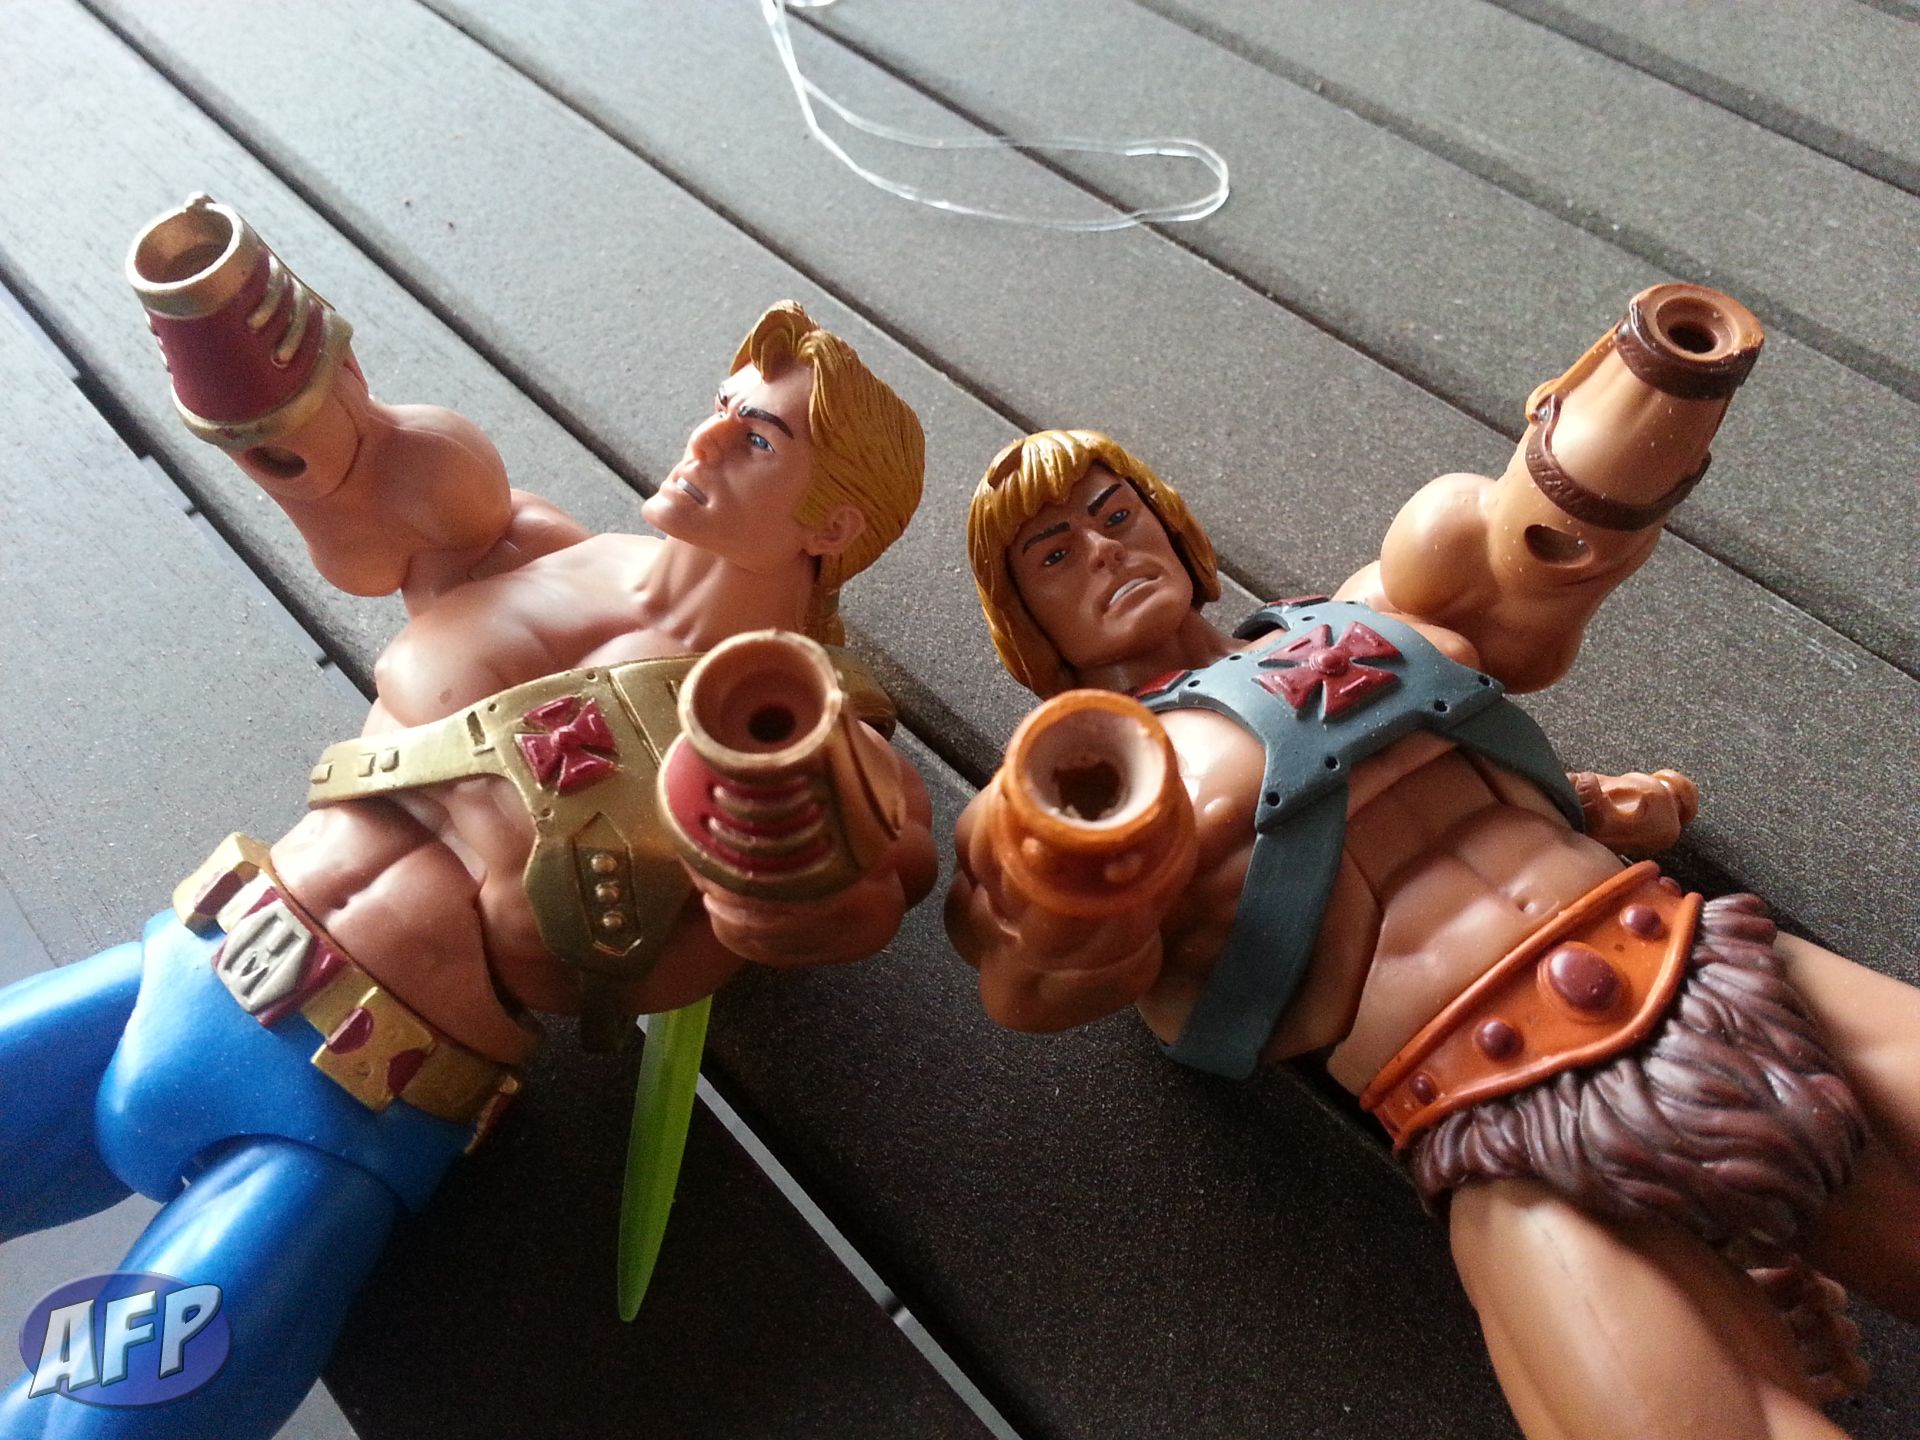
Left: Hands freshly popped off. Right: One arm done.
2) Use the Dremel with grinding stone bit to carve out a concave opening in his forearms. Then use the cutting bit to make the peg hole deeper.
When you compare the sockets in the two He-Men’s forearms, you’ll notice that the ones in the New Adventures He-Man forearms go deeper. That’s to accommodate the rounded portions of the hands that house those awesome hinges that make the iconic pose possible. So the first part of this step, you’re just carving out rounded areas so that you can sink the hands into the forearms. Just start with the grinding stone in the middle and grind around the edges. You’ll naturally make a concave opening this way.
You’ll find that the pegs on the New Adventures hands will block the rounded portions of the hands from sinking in far enough, because the peg holes aren’t deep enough. By pushing the cutting bit straight into the forearms, you can extend the peg hole deeper into the forearm.
Using the Dremel is really the only time you need to be careful. You don’t want the Dremel to slip out of the forearm and mark up any of the visible parts of the figure, or take chunks out rrof you. If you have a multi-speed Dremel, start off on the lowest speed so you can easily control it.
3) Try a test fit. Go back to step 2 and the Dremel as needed.
Just take your time and do frequent checks to see how the hands fit. At the start, when you are doing the concave portion and before you deepen the peg holes, you can just fold the pegs on the hands back and just test how the round portion fits in the forearms.
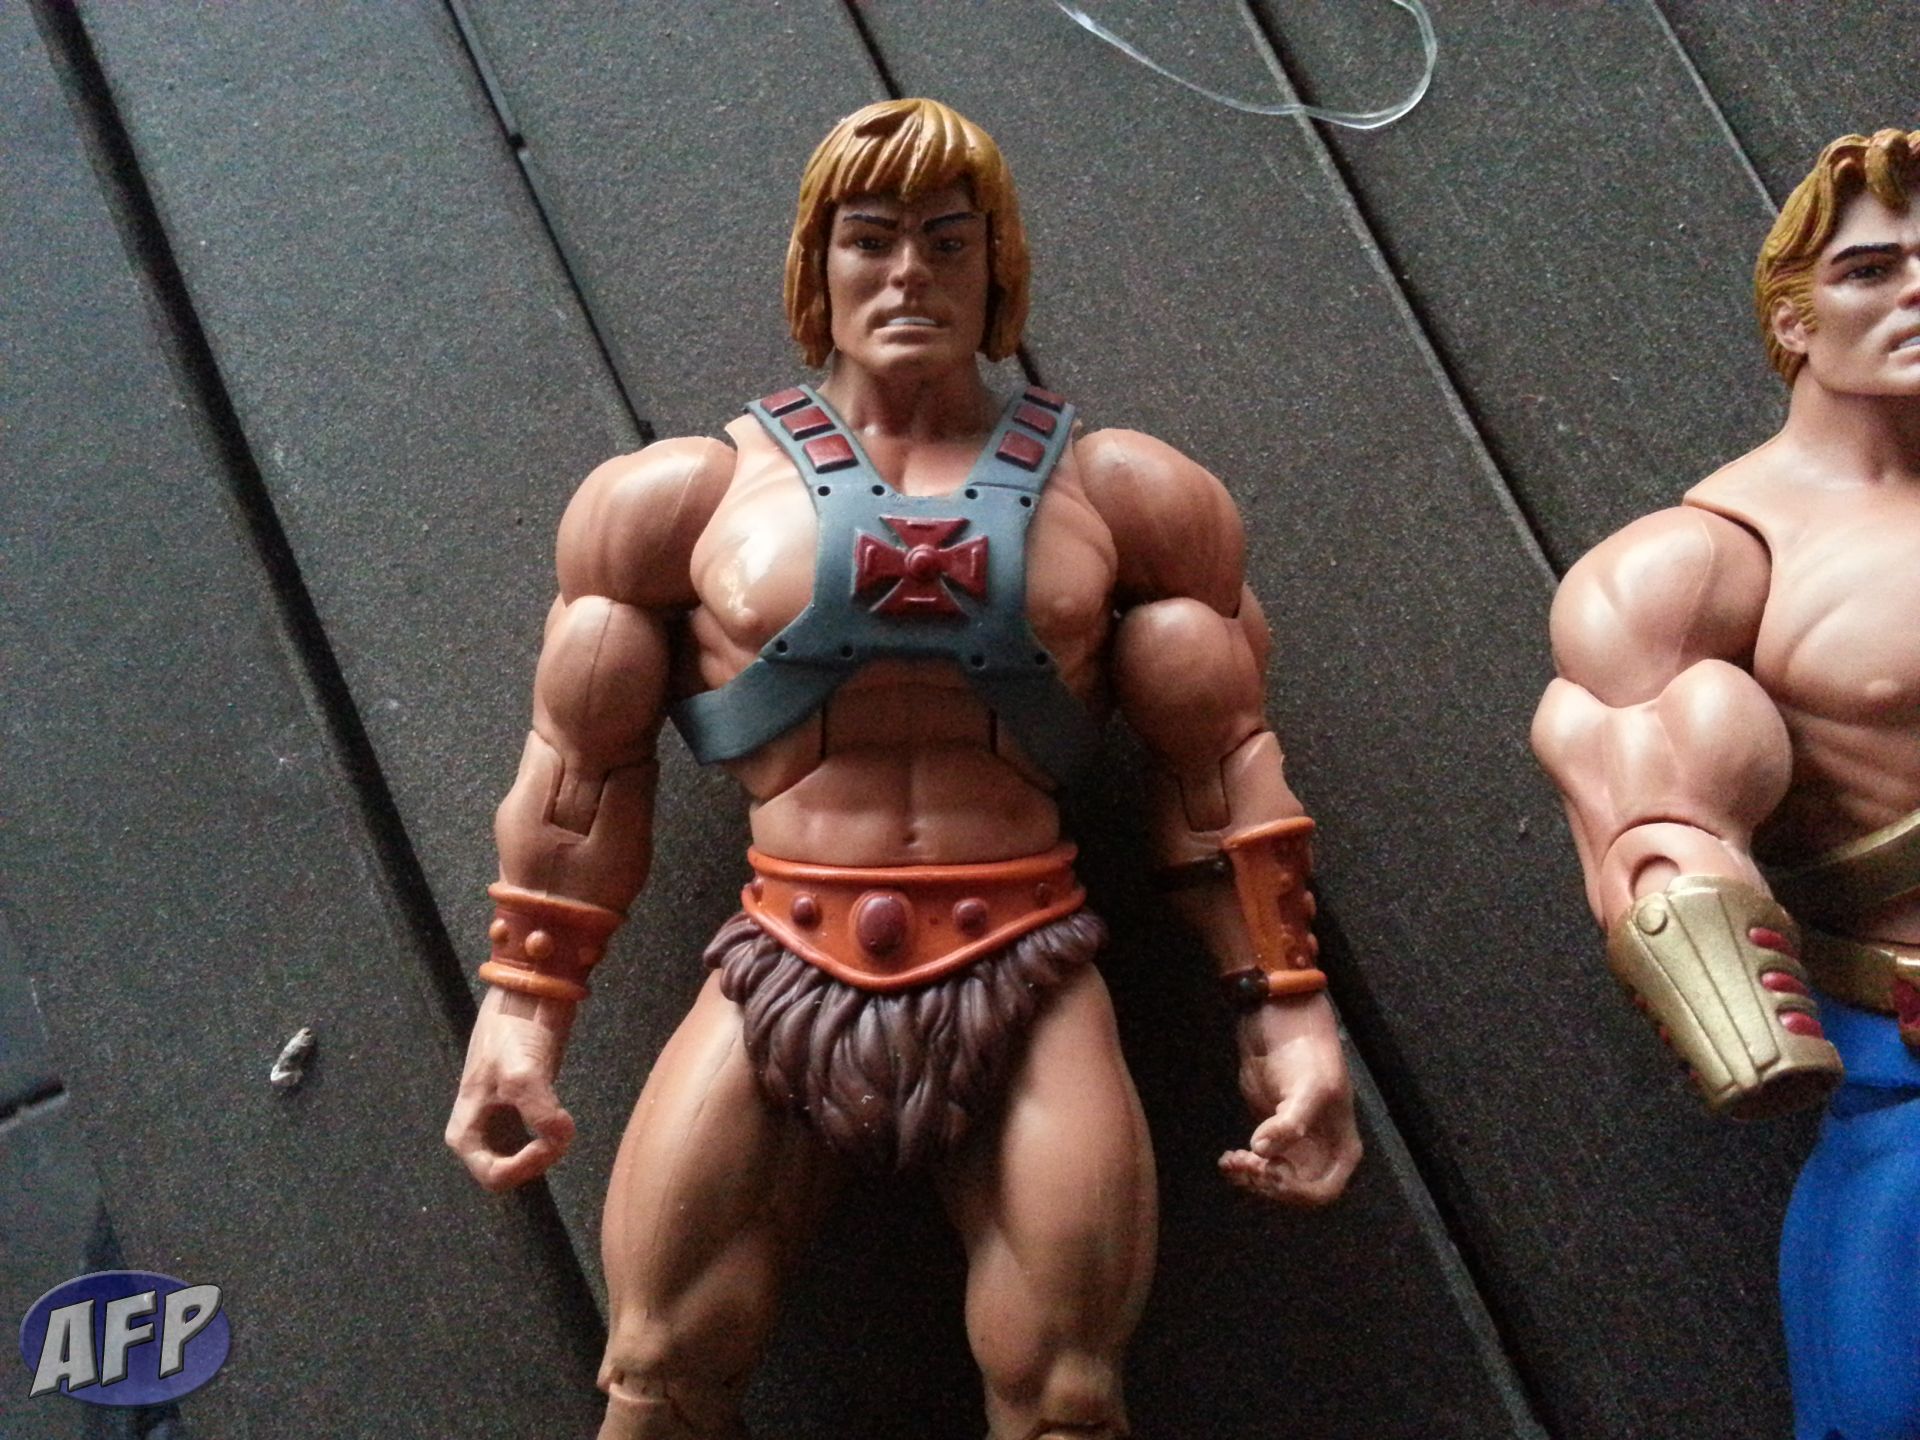
At this point, I was liking how He-Man’s right hand was fitting, but felt his left hand could use some more room in the forearm to fit deeper.

4) Fill the forearms about halfway with silicone sealant, then insert the hands.
Because you are grinding down the plastic rings in the forearms that grasp the original hands’ pegs tightly to make room for NA’s hands, you may find that when you are inserting the new hands that the hands may wobble a bit or even fall out. This is where the silicone sealant comes in.
While silicone doesn’t form as hard a bond as a two-part epoxy (like Oatey’s Plumber’s Epoxy) I prefer to use it for a few reasons. There’s no way you can lock up the joints – it’d be a shame to finish this hand swap only to find the wrist hinge frozen in place. It’s clear, so you won’t notice any excess. And even if some of it squeezes out and gets on your figure, you can just peel it off.
For this step you squeeze out dollops of the silicone and scoop them into the widened openings you made in the forearms. It’ll be sticky and you might get some on the visible portions, but again, you can just wipe them off. Use the pegs of the NA hands by rubbing around the lips of the openings to make sure the silicon is coating as much of them as you can, including inside the extended peg hole inside. Then just insert the hands and pegs into the forearm, and give them a couple of twists to spread the silicon around again.
At this point you can leave it alone until the silicone has cured. Depending on the brand you have, that could take a few minutes or it could take hours. When it’s cured you’ll find that the silicone gives a little. It will keep the hands in there snug enough that they won’t fall out, but if you give them sharp tugs you will pull them out. This is useful if you find you need more silicone in there, or you want to simulate a career-ending wound.
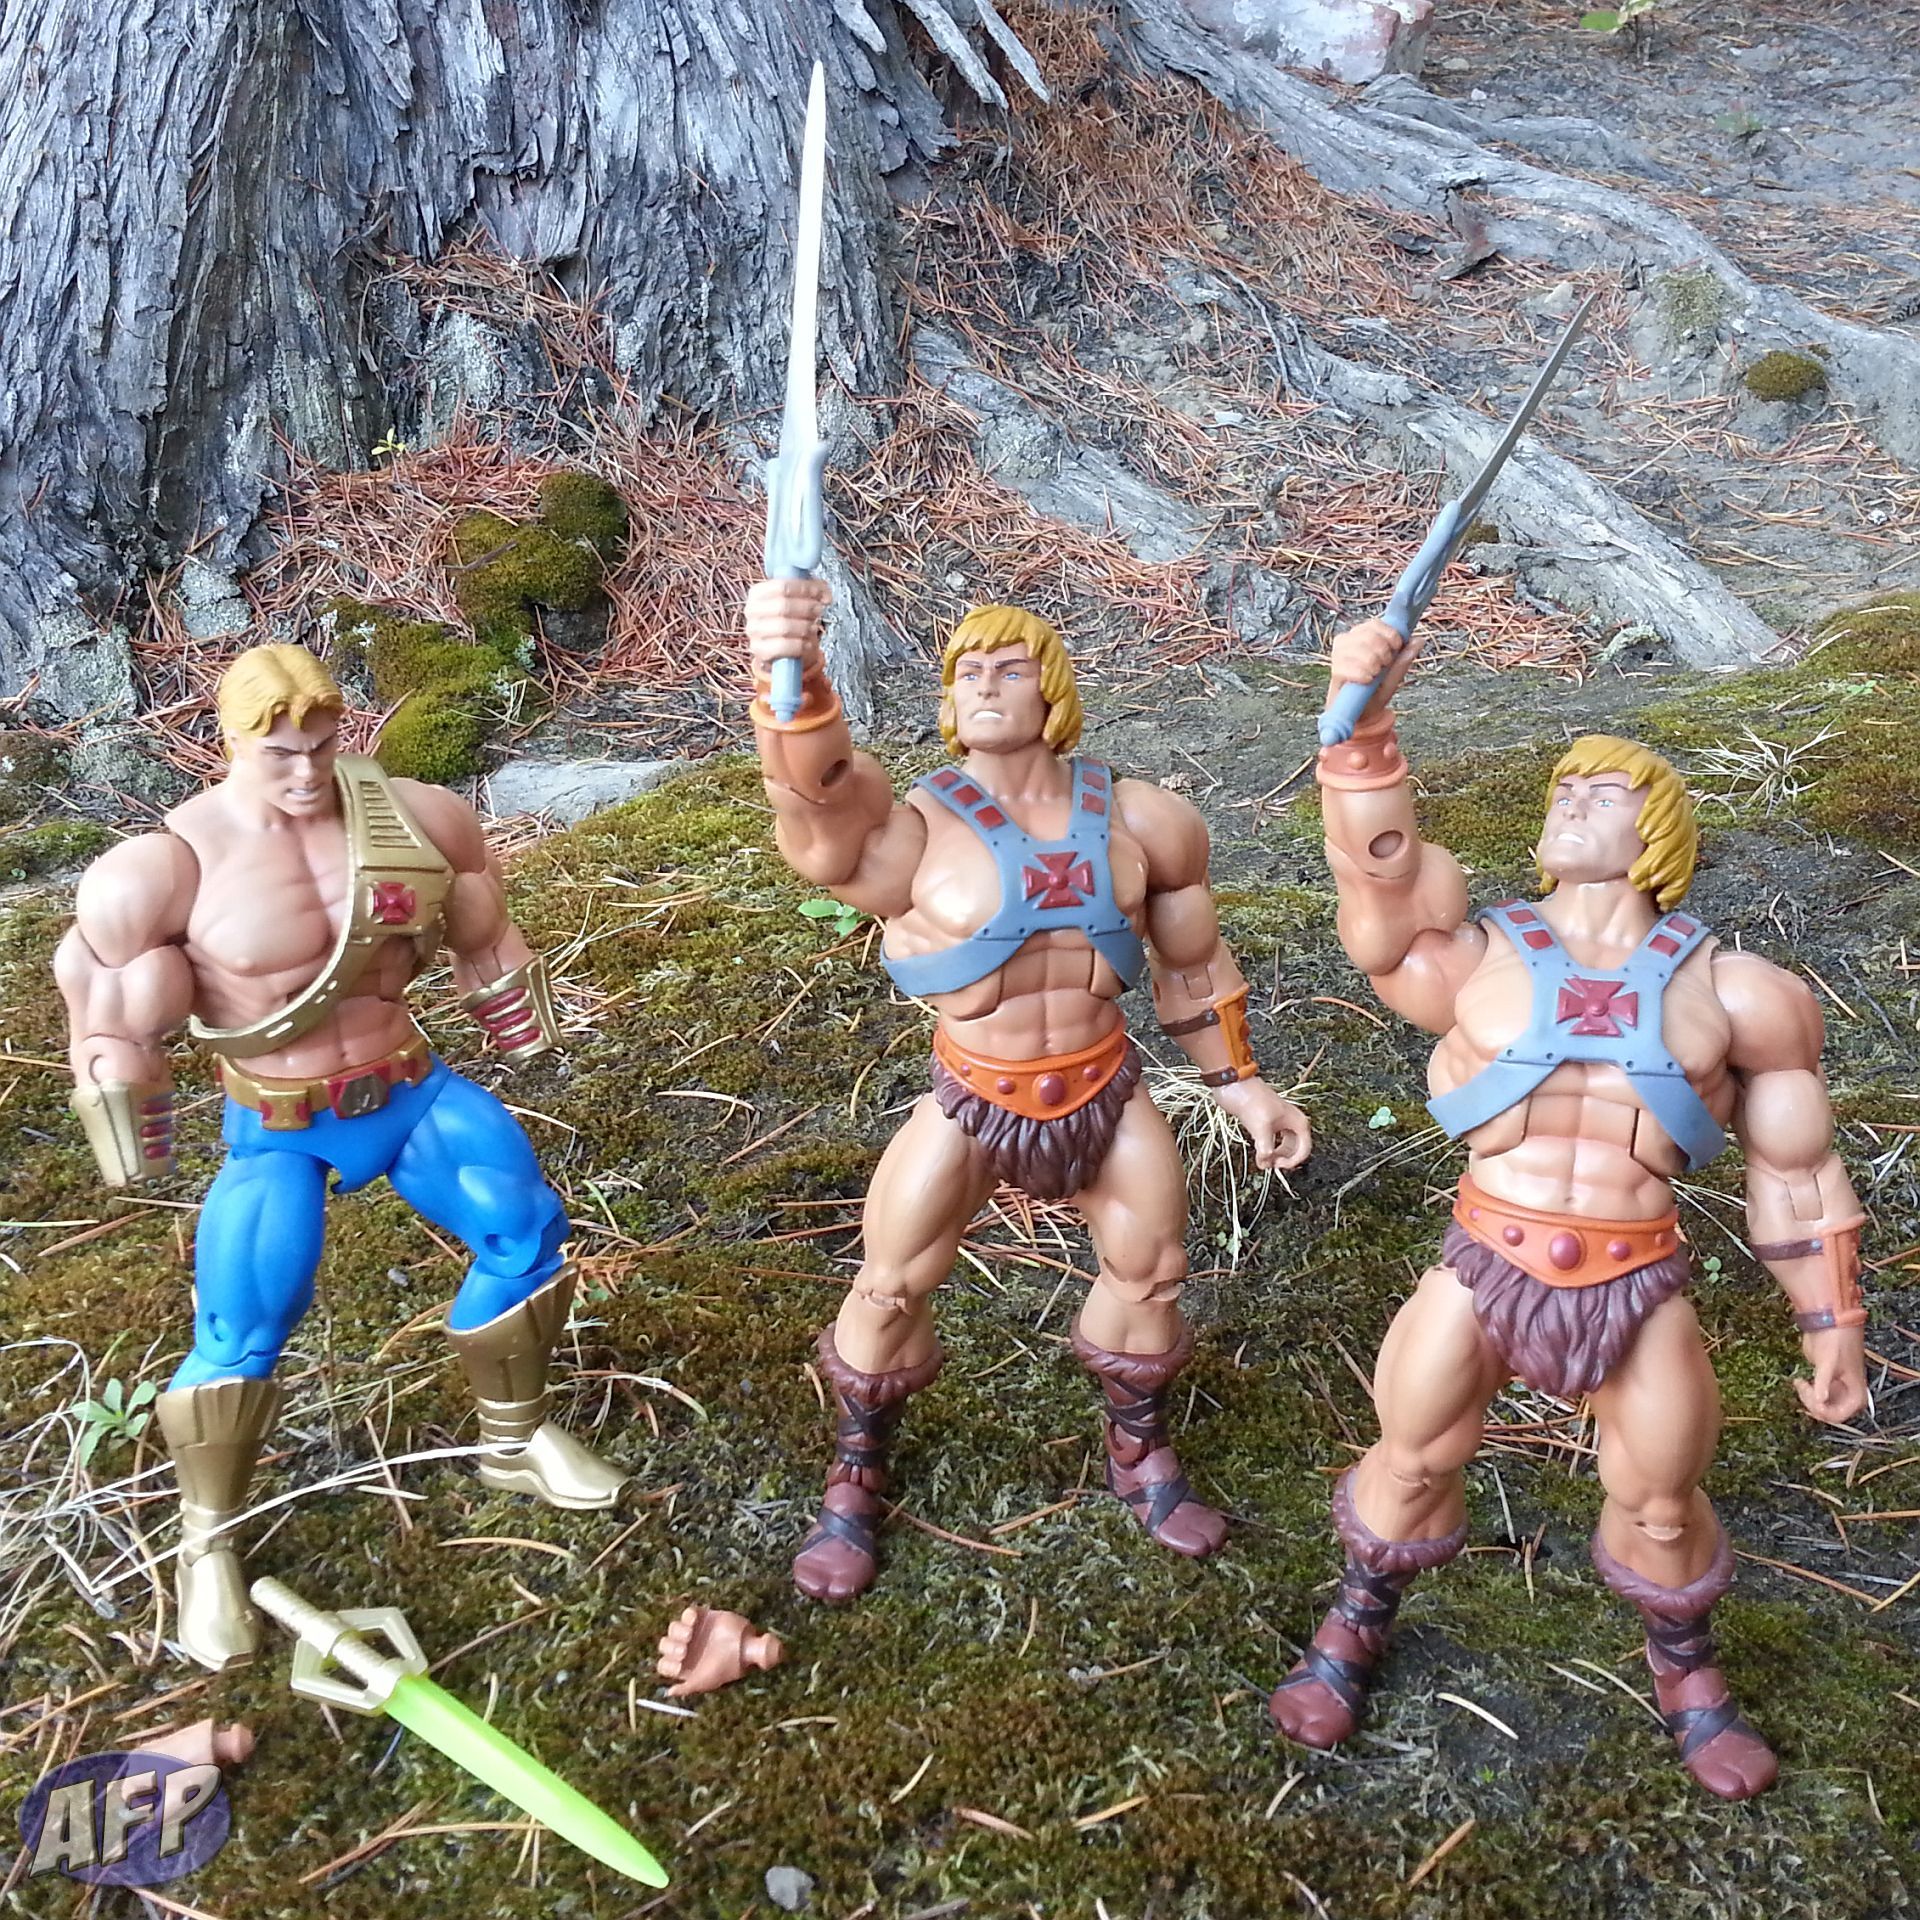
After the silicone is done curing, you’re done too! Of course, since the hand pegs are different it’s not quite as simple as popping the leftover He-Man’s hands back onto New Adventures He-Man’s arms. If you wanted to complete this step, it’s just another matter of using the cutting tool to widen the openings on NA He-Man’s forearms just a bit so the hands can pop in there. You can keep it snug – just use boil and pop to make the forearm peg holes more forgiving.
But since in my MOTU, New Adventures doesn’t exist, Mr. Ponytail can play the “punished shoplifter from the dark side of Eternia.”
If you give this a try, let me know how it works out for you. You have the power!
Boiling and popping is a caveman’s way….the hairdryer works much better.
@Hunter Knight C – since I have access to instant hot water, I’ve always found it more convenient than the hair dryer. but I’ve never really noticed that much of a difference between the two as far as effectiveness. why do you like the hair dryer more?
This is great. Thanks for the tutorial!
agreed with the hairdryer. but if I may add I found this figure quite lame. especially the buck, it should have been a part of the figure other than an accessory if you will. this is the same with space adventurer queen marlena. both would be great had the bucks been a part of the figure.
Or you could save a lot of time and energy and swap out the arms where the bicep and shoulders meet and repaint the gauntlets to match. If you’re using power tools anyway why not just open up the gauntlet on the original He-Man figure a little below the wrist allowing the original hand to pivot forward a bit (almost but not quite a ball joint like the figure’s head has) getting the same or slightly better result without having to kitbash? Just a thought.
Is it just me or are the skin tones different?
MikeCavazos – I just compared them – the NA He-Man hands are slightly less tan original He-Man’s, but it’s not really noticeable in most lighting.
SamuRon MikeCavazos
Ok, Thanks
This is great. If someone would kindly create a guide to swapping feet/boots and bodies for Masters of The Universe Classics without damaging the figures (too much) that would also be greatly appreciated.